 STEP FOUR: Final Sketching
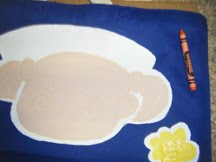
For this step, I got out the old crayola crayons. I wanted a color that wouldn’t stand out too much if I didn’t cover it completely, so I used a light orange. That’s because it was the closest thing to the light flesh paint. It’s a bit hard to see, but I adjusted the photo in Photoshop to try and help. Basically I just redrew my original drawing from memory. I also roughed in the letters of the name here with the orange.
 STEP FIVE : More colors
Now I began to really get going. The piece started to come to life as I filled in her hair and eye colors.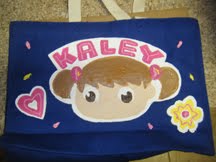
STEP SIX: Final Colors
Pretty self explanatory. I finished her name and hair bands in pink, and then got out the old “puffy paint” I’d used on the original bag a few months ago. I put puffy lines in the bands, the name, the heart, and the flower. Also, you’ll notice I put those little “spark” lines in pink and yellow around her head. They’re simple but effective. They also serve another purpose- color BALANCE. See, up until I put yellow “sparks” and yellow in the hair bands ( barely visible in this photo), the only yellow in the “picture” was in the flower. A real artistic “no-no”. You want colors echoed throughout the painting. Not in just one place, or it’s glaring to the eye.
Next time… DRAWING on the bag.
